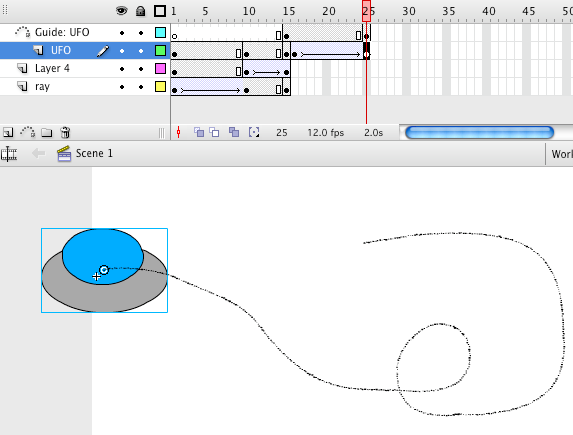
Symbols in Flash can use a motion guide to designate a more specific route, with the precision of the pencil tool, for the animation to follow (so you don’t have to make so many adjustments frame-by-frame).
Let’s add a motion guide to our UFO from last week. Click here if you weren’t here last week.
Your project will look something like this when you’re done:

After your last frame of the UFO, let’s have the UFO fly off.
- Click on the UFO in the last frame of the timeline. (If the last frame is part of a motion tween already, add a new keyframe right after it).
- Next to the Create a New Layer button there’s a box with a dotted line next to it. Click on that icon.
- Click on the new layer. Make sure it’s the same frame in the timeline as the end of your UFO.
- Insert a new keyframe in the Guide layer.
- On that keyframe, draw your new path with the pencil tool.
- Move your UFO symbol to snap to the beginning of the path you just created.
- Decide how long you want the UFO animation to be. Create a keyframe on the UFO layer a couple of frames down the timeline (more frames means the UFO goes slower on the path).
- Create a keyframe on the Guide layer the same number of frames down the timeline that you made the UFO.
- On the last keyframe, move your UFO to the end of the path, snapping the UFO to the line.
- Highlight the UFO frames from the start of its motion to the last keyframe. CTRL+Click (right click) on the highlighted frames. Create a Motion Tween.
- Test your movie.

