Posts Tagged ‘movies’

Uploading iMovies

November 19th, 2007

General instructions for the Virtual Classroom.

  1. To share the movie, click on Share->QuickTime->Webstreaming
  2. Go to the Virtual Classroom.
  3. Log in using your school computer login. (Enter the enrollment key and update your profile if you haven’t before.)
  4. Find section 2: Technology/Research Skills
  5. Click on your class name.
  6. Click on ‘Add entry’.
  7. Click on ‘Choose file’. Browse for where your movie (not your iMovie file, but the new .mov file) is saved. Click on the file and then click ‘Choose’.
  8. Click ‘Save and view’ to finish uploading your file.

Digital Booktalks – Movie Trailers

November 15th, 2007

When I was teaching Language Arts I wanted my last student-created booktalk to be an exceptional one. (I didn’t want a simple summary (probably from the back of the book) book report).

We watched the Spider-Man 3 trailer, looking for theme and symbolism. We then looked at a trailer storyboard to find the same elements of literature.

Students had read a literature circle book as a group of 4 and now they were ready to create the movie trailer.

Trailers needed:

  1. 5 different scenes from the book
  2. 10 different camera shots
  3. an interweaving theme
  4. 3 examples of text
  5. a music soundtrack
  6. to be 30-60 seconds in length

I tell you nothing teaches precision in words like a 30-60 second limit. If they were under, they didn’t have enough content. Over, and they were boring.

These editing skills transferred later into their essays and narratives. (Woo!)

A week with iMovie and then we were ready for the HJHS film festival. At lunch we had standing room only in the library (my obsession was long-building) as most of the 8th grade student body watched everyone’s trailers on an iDVD.

When do you have students asking for a copy of their book report to show off?

iMovie Titles

November 1st, 2007

This tutorial is designed for use with the poetry portfolio assignment, but can be applied to other work.

  1. Click on the iMovie HD icon in the dock.
  2. Create a New Project
  3. Name it with the assignment name, your class period, and your last name. (Example: ‘portfolio-4th-guy’). Save it to the hard drive by selecting Macintosh HD->Users->Shared and then click Save
  4. Click on Editing -> Titles to add your text.
    Photobucket
  5. Make sure that your text is big enough to read. You will probably need to split up your sentences into smaller phrases.
  6. Type single words as titles for emphasis.
  7. You can use the slide to adjust how many seconds the animation takes and how long it pauses.
    Photobucket
  8. For pictures, drag your image from the desktop/documents onto the timeline/clip view.
    Photobucket
  9. To change the animation, click on the photo to select it. Click on Media->Photos and then Show Photo Settings
  10. With the Ken Burns Effect on, the photo will slide in/zoom out in many different ways. Drag the top slide bar to zoom in and out. Drag the bottom one to make the animation speed up or slow down.
    Photobucket
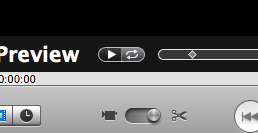
  11. Your Preview bar has its own animation timeline. Click on the animation timeline to select which place to zoom in.
    Photobucket
  12. The hand lets you control the position of the photo. Click and drag to move the camera’s focus.
  13. To add sound, make sure that you are in the project’s timeline mode first. Click on the clock to switch from clip mode to timeline mode.
    Photobucket
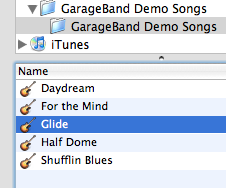
  14. Click on Audio to view your iTunes library, GarageBand songs, and Skywalker sound effects.
    Photobucket
  15. Click on a song and drag it to the second line in the timeline.
    Photobucket
  16. Click on the triangle and drag it to go to different parts of the timeline/project.
  17. To shorten a clip, click on it to highlight it, move the triangle to where you want to cut it, select from the top menu Edit->Split Clip to make the cut.
    Photobucket
  18. Click off of the clips to deselect both, then click back on the clip that you don’t want. Press the delete key to get rid of it.
  19. Click on Editing->Transitions or Editing-> Video FX to make your presentation more professional.