Archive for the ‘Flash’ category

Isometric Game Engine

January 26th, 2010

Isometric perspective is a way to use 2D images to create a 3D environment. Flash normally operates in 2D images; Chris Lindsey created a game engine in Flash to represent a 3D environment. The engine does require ActionScript 3, though, so it won’t run properly in ActionScript 2.

A game engine is not a game in itself- it is the power behind the game. Programmers will design an engine to run their video game and then license that engine to other game developers. Here’s a list of some of the current game engines out there.

Things to look at in this game engine:

  1. There are no movie clips on the stage to begin with. The code places the movie clips onto the stage when you test the movie/make the .SWF file.
  2. All of the code is in just one frame. You don’t have to search all over for it – this is really appreciated.
  3. There’s a giant array of numbers.
    Photobucket
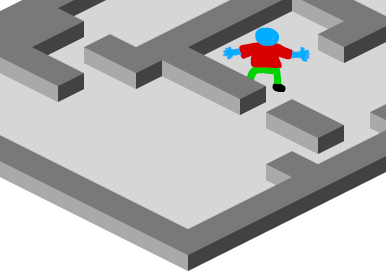
    This is your map. If it says ‘200’, that’s a wall piece that gets placed. If it says ‘100’, that’s a floor piece.
    Photobucket

Save a copy of the .FLA file so you have the original and then one to work with. Try editing the ‘hero’ movie clip. Draw your artwork on a new layer inside the movie clip. You can then delete the original box image layer. To help you out, you can turn the box layer into an outline by clicking on the colored box on the layer (in this picture it’s yellow).
Photobucket

Once you get used to how the artwork is set up, try expanding the map by adding a new line of 100s and 200s in the ActionScript.

Click on the game to play it. Use the arrow keys to move your character around.

The .FLA file with all of the code can be found by clicking here.
Republic of Bacon

January 25th, 2010

In the Future Professionals club, we’ve looked at using Flash for animations. We’ll examine ActionScript code to make Flash games.

But something we don’t normally focus on is using Flash for website design. It makes for some fun interface, but be warned: not every device supports Flash.

Check out the new site The Republic of Bacon for a great example of a site designed in Flash (and for a Bacon Rice Krispies Treat recipe).

Looking Glass Wars 3: Arch Enemy by Frank Beddor

January 21st, 2010

Frank Beddor was the first author that I hosted in my library, so the Looking Glass Wars has a bit of nostalgia for me. When I read Beddor’s books, I can hear his voice coming through (and when the narrative gets excited, I remember when he jumped on a desk and yelled to the kids).

Arch Enemy has the same fun from the other books. Hatter Madigan shows up (I’d be angry if he didn’t) complete with his Millinery arsenal. As in Seeing Redd, we witness more of the Hatter’s family life. This book definitely has an emphasis on developing the character of Homburg Molly. She’s the one to show up in England and interact with the Liddells and Charles Dodgson.

We get to see more of Dodgson’s day-to-day life. What makes it LGW, though, is when the assassin with razor blade fingerprints shows up to harass the Liddells.

You definitely need to read the first two books in order to understand Arch Enemy. It had been a couple of years since I did, so it took me some time to recall the plotline of the others. Beddor does a good job of re-describing characters but does not spend much time re-telling history.

If you’re a fan of the caterpillar oracle council, you get to see the whole rainbow discussing the fate of Wonderland. Part of the intrigue is trying to figure out the caterpillars’ motivation. Pay attention to them, though, because their part grows throughout the book.

For me the ending seemed kind of rushed. I was reading, thinking, “There’s ten pages left…how is this going to resolve?” I pictured Alyss and Dodge as in their teens but then some artwork inside the book makes Dodge look more Han Solo-ish. Also, there’s a marriage proposal brewing that came out of nowhere. Sure, it adds to the relationship with Alyss and Dodge, but it seemed kindof tacked on to me. I’d be interested to hear other people’s thoughts.

This is an enjoyable book and fans of the series won’t be disappointed. It says that it’s the conclusion of the trilogy, but Beddor left the world wide open for more exploration. Expect more Hatter comics and online games.

Creating a Motion Guide in Flash

January 20th, 2010

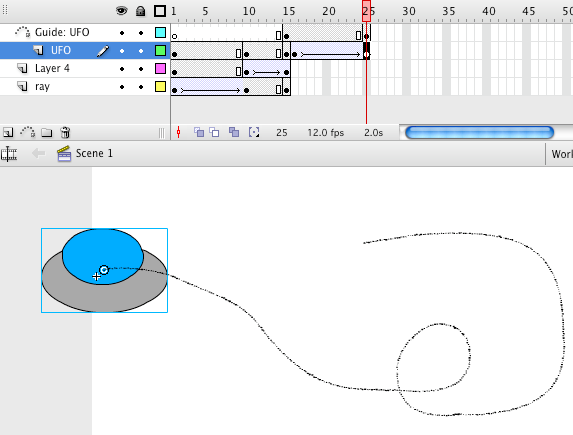
Symbols in Flash can use a motion guide to designate a more specific route, with the precision of the pencil tool, for the animation to follow (so you don’t have to make so many adjustments frame-by-frame).

Let’s add a motion guide to our UFO from last week. Click here if you weren’t here last week.

Your project will look something like this when you’re done:
Photobucket

After your last frame of the UFO, let’s have the UFO fly off.

  1. Click on the UFO in the last frame of the timeline. (If the last frame is part of a motion tween already, add a new keyframe right after it).
  2. Next to the Create a New Layer button there’s a box with a dotted line next to it. Click on that icon.
  3. Click on the new layer. Make sure it’s the same frame in the timeline as the end of your UFO.
  4. Insert a new keyframe in the Guide layer.
  5. On that keyframe, draw your new path with the pencil tool.
  6. Move your UFO symbol to snap to the beginning of the path you just created.
  7. Decide how long you want the UFO animation to be. Create a keyframe on the UFO layer a couple of frames down the timeline (more frames means the UFO goes slower on the path).
  8. Create a keyframe on the Guide layer the same number of frames down the timeline that you made the UFO.
  9. On the last keyframe, move your UFO to the end of the path, snapping the UFO to the line.
  10. Highlight the UFO frames from the start of its motion to the last keyframe. CTRL+Click (right click) on the highlighted frames. Create a Motion Tween.
  11. Test your movie.

Creating a fading movie object in Flash CS3

January 13th, 2010

Today’s Future Professionals meeting is going to involve a cow being abducted by a UFO.

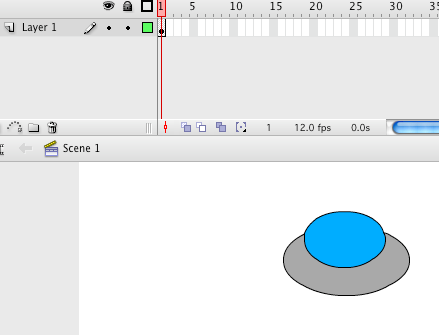
  1. Create a Flash ActionScript 3 file.
  2. Created a movie clip of a UFO.
    Photobucket
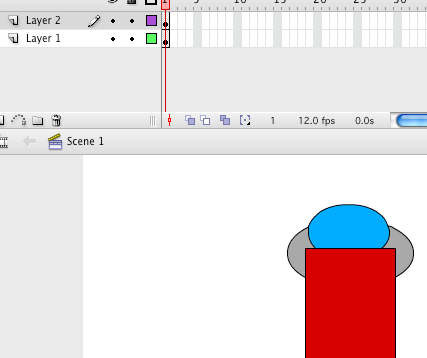
  3. Create a new layer and put a movie clip of a teleporting ray on that new layer.
    Photobucket
  4. Drag the ray layer underneath the UFO layer to make the ray underneath the UFO.
  5. Insert a keyframe on frame 10 of the two layers.
  6. Click on frame 1 of the ray layer.
  7. Click on the ray movie clip.
  8. In the movie clip properties window, where it says ‘Color: None’, change it to ‘Alpha’.
    Photobucket
  9. Drag the Alpha down to 0%.
  10. Select all of the frames on the ray layer.
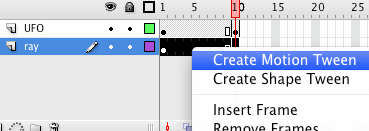
  11. CTRL-click/right-click on the highlighted frames in the timeline. Choose ‘Create Motion Tween’.
    Photobucket
  12. Now it’s up to you to add a new layer, the cow layer, and do a motion tween to have it disappear inside the ship.

Aniboom

December 1st, 2009

I was working on another tech project that I’m sure you will see here later when I stumbled across Aniboom. Am I the only one who didn’t know about this site?

I work with the Future Professionals on how to use Flash. Aniboom is a great (free) resource to think through the animation process. It’s a webapp that has a pretty sophisticated file system. It even exports as an animated GIF, which was the most impressive part for me.

Like anything we do in Future Professionals, I like to have a demo.
Here is my animation that I created in four minutes:
M2.2
Yep. Pong.

Creating a quiz game using ActionScript

May 1st, 2009
    Setting up the Project

  1. Open a new Flash document.
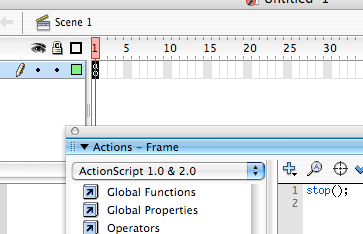
  2. Click on Layer 1, Frame 1. Add a stop(); action to stop the playhead.
  3. On a new line in the code, establish a variable to hold the score.
    The code so far:
    stop();
    score=0;

    We set up the score variable here so we can change it as the user gets questions right.
  4. Create a new layer in frame 1.
  5. Create text as a title for your game (so the user isn’t staring at a white screen).
  6. Making a Button

  7. That’s great, but we need a way to get past this screen. We’ll need a button. Click on Insert->New Symbol and choose ‘Button’.
  8. Buttons have an Up, Over, Down, and Hit. Up is its natural state. Over is if some hovers a mouse over the button. Down is what it looks like when it gets clicked. Hit is the Hit Zone – if you want a bigger area to register if it’s been clicked on or not. Normally Hit is the size of a box around the button.
  9. Make a keyframe in each area to change the states of the buttons (what they look like). Notice that you can insert multiple layers.
  10. Drag that button onto the stage.
  11. The button is clickable, but it doesn’t know what else to do. With the button selected (blue highlight around it), open up the ActionScript for that button.
  12. Telling the Program to go to the Next Part

  13. Type on( . Remember from previous lessons that when we see the parentheses, it means the function is calling/looking for a variable. Most modern versions of Flash will try and guess which one you want. Select press. (When someone clicks the button, it goes. You could choose release and the user could click and hold and then go when the user releases the mouseclick.)
  14. Add a funky bracket ( { is called a brace, to be technical) to start your list of commands.
    The code should now be:
    on(press) {
  15. Start a new line to maintain style.
  16. Type in gotoAndPlay(2); Notice that the ‘A’ and the ‘P’ are capitalized. Also look at how the function calls a variable – the number ‘2’ – to tell the game to go to frame 2.
    The code now is:
    on(press) {
    gotoAndPlay(2);
    }
  17. If you run the program right now, when you click, it will go to frame 2 (or even just consider frame 1 the end of the movie if you haven’t added anything yet to frame 2) but then loop back to frame 1. We need to put a stop(); code in frame 2 just like we did for frame 1. You’ll need to insert a blank keyframe and then click on the ActionScript arrow.
  18. Once you’ve added the stop();, on a different layer create text with your question.
  19. Use the Same Button Multiple Times to Make Your Life Easier

  20. We need buttons for our answers. If we create one button in the Flash library, we can then drag it in multiple times and not have to re-do animations. Create that button.
  21. Drag the button from the library onto the stage. Create a text box next to the button that has an answer.
  22. Drag the button from the library again onto the stage for the second answer. Put a text box next to the button with an answer.
  23. Checking for the Wrong Answer

  24. Click on the button next to the wrong answer to select it (blue outline).
  25. Let’s add some code for the wrong answer. Let’s add a gotoAndPlay(3); to the button (with the on(press) and all that) to take the user to frame 3, which is where we’ll mock them for getting the wrong answer. (Mock them nicely and politely.)
  26. Make sure to add a stop(); code in frame 3 to avoid the jumping loop. You’ll need to insert a blank keyframe.
  27. Create your end of game screen. Be nice and include a button to take us back to frame 1.
  28. Checking for the Right Answer

  29. Let’s say the user got the question right. Go back to frame 2 and edit the ActionScript for the correct answer button.
  30. Send the user to the next question – frame 4 – with a gotoAndPlay(4); What’s different this time, though, is that we need to add to the score. On a new line in the ActionScript type in score = score + 10; We just took the score and added 10 points to it. (It will still complete the rest of your list of commands – but to keep it straight in the minds of the humans who may be reading over your code later, add to the score first and then put in the goto.
    The code should look like:
    on(press){
    gotoAndPlay(4);
    score = score + 10;
    }
  31. Displaying a Score

  32. On frame 2, create a new layer. Let’s label what the user is looking at. Create a text box somewhere on the screen that says ‘Score’. If it’s on it’s own layer and it’s own keyframe, it will constantly say ‘Score’ throughout the whole program.
  33. Now let’s show the actual score. Click on the tool to make a text box, but instead of creating a text box, just click where you want to show the score.
  34. In the Properties at the bottom of the work area, change it from Static to Dynamic text. Dynamic and Static are just like with characters in a story – dynamic changes, static stays the same.
  35. In that text’s Properties, there’s a place called ‘Var: ‘ with an input box next to it. Type in score. It will now show the value for score. Make sure that you don’t put this in frame 1, because frame 1 is where we initialize/set up the variable.
  36. Thoughts to Enhance the Game

  37. You can add to score whenever the user clicks on the right answer button. You can subtract from score when a user gets the wrong answer.
  38. You can add as many buttons as you like – you don’t just have to have two questions.
  39. Not all buttons need to be easily seen. You could say “Click on the duck” but have the Up be blank and have the Over show a duck. The user would have to roll around the screen to try and find the right button.
  40. You can create a variable called whichframe to control which frame a gotoAndPlay goes to. Instead of gotoAndPlay(4); it could be gotoAndPlay(whichframe);

Random Numbers in ActionScript

April 15th, 2009

To create a random number in ActionScript:

Math.round();

but that will give you crazy decimals.

Add onto that code:

Math.round(Math.random());

to give you prettier numbers to work with.

To give you a number between 1 and 10, use some multiplication:

Math.round(Math.random()*10);

Try putting this with some _x or _y actions.

Re-Posting: Flash Game Sample

April 8th, 2009

Here’s a re-posting of a sample from last year. Use this to add some code to your circleman movies.

Today at Future Professionals I could see that some were almost ready to start programming in Flash, but were intimidated by the time that it takes to get used to ActionScript.

It, literally, is another language. Just like Spanish or French, it takes some getting used to. One of the ways that I became familiar with programming was by taking apart other people’s programs.

So I give to you a game that I made for my friend Brian. (In my high school group of friends was Tommy, Tommy, Brian, Brian, and Mike.)

Click on the .fla file to download the source. (Depending on where you are, you may need to right click/control click.)

Brianland Source File

Test the movie in Flash to see what it does (spacebar fires and arrows move) and then experiment.

As you experiment, try to:

  1. Increase the amount of money the character gets
  2. Increase the number of hook gnomes
  3. Change the amazing artwork

Once you are comfortable with editing the parts of the program, try editing other people’s files and finding tutorials.

Re-posting of ActionScript Tutorial

March 27th, 2009

Once you’ve mastered this, try out the Pong tutorial by the Flash Ninja Clan here.

(and for Future Professionals, but we’ve been working on this)

The first type of code that I like to introduce is “stop();”. Put this in the ActionScript for the first frame. Test the movie. Instead of moving on through the frames, it stops in frame 1. How exciting.

Let’s animate a figure.
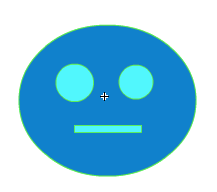
circleman
This is circleman. He is a very complex character with artwork that took me hours to draw.

To be able to easily reuse circleman, instead of drawing him on the stage, I made him a separate movie clip in the Flash file’s library. That way I don’t have to spend hours re-drawing him.

Right now he’s kindof boring in his new layer on frame 1, especially since the “stop();” command doesn’t move the animation anywhere. But for this movie, all of the fun will happen in one frame.

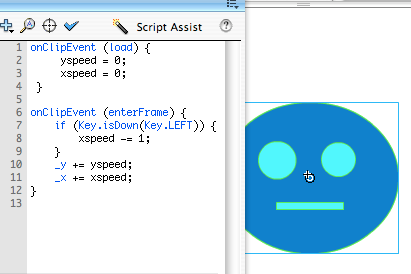
Make sure that circleman is selected, click on his ActionScript button, and type in the code that you see in the picture:
Move Left code

The onClipEvent(load) is a one time thing when that movie clip shows up in the frame the first time around. You’re setting up the initial values of the speed.

The onClipEvent(enterFrame) is every time the frame loops. With the LEFT function, it’s making your xspeed value a negative one. Outside of the Key.isDown(Key.LEFT) function the _x and _y is being added to whatever your xspeed and yspeed values are. It will do this each time the frame loops (many times per second). This creates the constant motion. If you don’t like the constant motion, you could put the _x += xspeed; part inside the Key.isDown function to add the xspeed only when the key is down.

Remember: Brackets start and stop a function. Every time there’s an open bracket it has to close the function somewhere with a close bracket.

Back to the Key.isDown, the way we’ve got it set up, circleman moves left until he is stuck in the netherworld called “Offscreen” with no hope of return. Add some UP, DOWN, and RIGHT Key.isDown functions.

Boundaries
Here’s where stuff gets crazy.

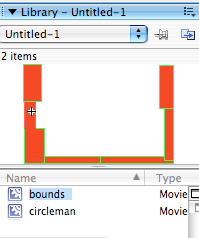
Create a movie called “bounds”.
bounds
This will be your environment/world/level.
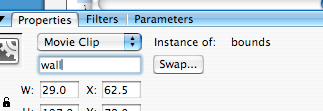
Put the movie bounds on the stage. Name its instance “wall”.
wall

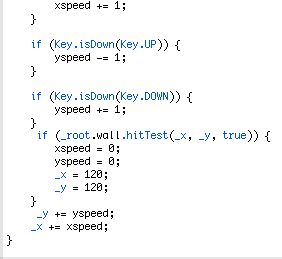
In circleman’s ActionScript, add a hitTest after your Key.isDown code but before your _y+=yspeed; stuff.
hitTest
If the character hits the bounds, it stops and then moves to new x,y coordinates.

This ActionScript dictionary is officially your best friend.