Archive for the ‘Tech How To’ category

iMovie Titles

November 1st, 2007

This tutorial is designed for use with the poetry portfolio assignment, but can be applied to other work.

  1. Click on the iMovie HD icon in the dock.
  2. Create a New Project
  3. Name it with the assignment name, your class period, and your last name. (Example: ‘portfolio-4th-guy’). Save it to the hard drive by selecting Macintosh HD->Users->Shared and then click Save
  4. Click on Editing -> Titles to add your text.
    Photobucket
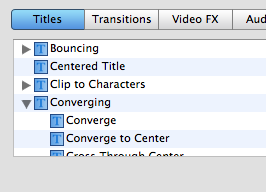
  5. Make sure that your text is big enough to read. You will probably need to split up your sentences into smaller phrases.
  6. Type single words as titles for emphasis.
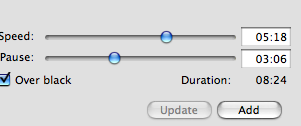
  7. You can use the slide to adjust how many seconds the animation takes and how long it pauses.
    Photobucket
  8. For pictures, drag your image from the desktop/documents onto the timeline/clip view.
    Photobucket
  9. To change the animation, click on the photo to select it. Click on Media->Photos and then Show Photo Settings
  10. With the Ken Burns Effect on, the photo will slide in/zoom out in many different ways. Drag the top slide bar to zoom in and out. Drag the bottom one to make the animation speed up or slow down.
    Photobucket
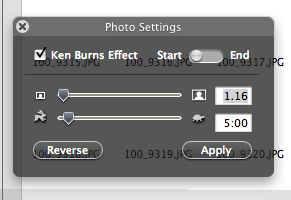
  11. Your Preview bar has its own animation timeline. Click on the animation timeline to select which place to zoom in.
    Photobucket
  12. The hand lets you control the position of the photo. Click and drag to move the camera’s focus.
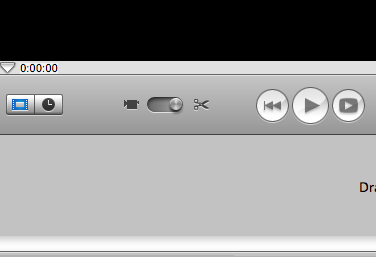
  13. To add sound, make sure that you are in the project’s timeline mode first. Click on the clock to switch from clip mode to timeline mode.
    Photobucket
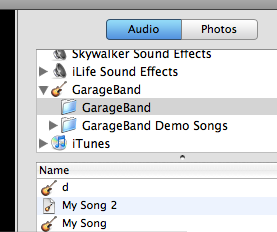
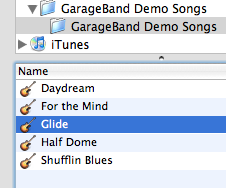
  14. Click on Audio to view your iTunes library, GarageBand songs, and Skywalker sound effects.
    Photobucket
  15. Click on a song and drag it to the second line in the timeline.
    Photobucket
  16. Click on the triangle and drag it to go to different parts of the timeline/project.
  17. To shorten a clip, click on it to highlight it, move the triangle to where you want to cut it, select from the top menu Edit->Split Clip to make the cut.
    Photobucket
  18. Click off of the clips to deselect both, then click back on the clip that you don’t want. Press the delete key to get rid of it.
  19. Click on Editing->Transitions or Editing-> Video FX to make your presentation more professional.

GarageBand

October 29th, 2007

This GarageBand tutorial is designed for the Great Expectations Radio assignment, but can find many other uses. Screenshots taken from GarageBand running on OSX Tiger.

  1. Click on New Podcast Episode
    Photobucket
  2. Save the file with the project name (Example: GE Radio) and then your group number. Don’t put your last name on it since it will go across the Internet. For our network, make sure to save to the Shared folder.
  3. The default should work with the podcast artwork track, male voice track, female voice track, jingles, and radio sounds.
    Photobucket
  4. If you will have more than one gender, you can add more tracks by clicking on the menu at the top with Track and then New Track. Make it a Real Instrument, select Vocals, and then the appropriate speech filter.
    Photobucket
  5. Click on the Female (or Male) Voice. Click on the big red circle at the bottom of the screen to start recording. Get your content recorded first. Fancy jingles and zingers only go so far.
    Photobucket
  6. As you perform, make sure to watch the audio levels to not “go hot” and crackle your voice.
    Photobucket
  7. Now click on the Jingles. Click on the Blue Eye in the bottom left of the window.
  8. Click on Jingles underneath the eye to then expand to different sample. Click on a theme song that fits your project.
    Photobucket
  9. Drag the jingle name onto the Jingles track in your workspace.
  10. Hover your mouse on the end of the jingle. It will turn to a bar with an arrow. You can now click and drag to extend the length of the clip to match your podcast length.
  11. Click on Radio Sounds. Make sure the Blue Eye is selected so you can find a stinger/sound effect to appropriately match/emphasize what you are talking about.
  12. Click and drag any audio clip to move it where it best fits.
  13. If you want to trim any clip, click on the clip to select it, move your timeline marker at the top
    Photobucket
    to match where you want to cut. At the top menu, select Edit and the Split. Now click on the chunk that you don’t want and press delete.
  14. Sometimes if you have trouble selecting on audio clip, click on the gray part of the control panel to deselect everything and then click on your target clip.
  15. Move your purple triangle to the end of your podcast. If there is a lot of space between the end of the podcast and your purple triangle, there will be dead air when you export your podcast. (I ruined many a podcast before I realized that. I pass on the experiential wisdom to you.)
    Photobucket
  16. For the photos: These are going to be published online. Make sure that the photos you choose are yours, stock photo, or open license. You can’t just go steal some photos from Google Images anymore.
  17. If any of the audio is too loud, you can adjust the individual track levels, measured in decibels. You can also adjust whether the track is in stereo or will come out of the left or right speaker. (Which is really quite cool when you think about iPod headphones.)
    Photobucket
  18. The plus button in the bottom left (next to the Blue Eye) is a shortcut to add more tracks.
  19. Right now just Share to iTunes. Tune back later for how to upload online.