Archive for the ‘Video Editing’ category

Pixorial: Free Video Editing Software

December 19th, 2012

Yes, I’m a huge fan of Premiere, Final Cut, and iMovie (Movie Maker’s decent, but I wouldn’t say I’m a huge fan), but sometimes students don’t have access to those applications. More and more we’re seeing webapps that offer full features to rival what you would have had to download mere years ago. Thankfully there are webapps that work well and are free; Pixorial is one of those.

Pixorial allows you to upload videos, trim them, add titles and music, and then share them online (from what I can tell there’s no DVD authoring). Sure, you probably won’t use it for a dance recital, but Pixorial seems to offer what we need for video assignments with students. The fact that there are Android and iOS apps that help with uploading is a big plus for me. Add to that the ability to incorporate your Google Drive and it looks promising. I’ll have to try it out more when finals are over.

Vimeo Music Store

September 22nd, 2011

When we create videos, many times students want to use copyrighted music in their projects. We use GarageBand for students to mix their own loops (and maybe even venture into the musical typing feature), but another option is the Vimeo Music Store. You can search by cost and copyright. Some are free, so you might want to check it out. It’s blocked in our district, but maybe not in yours.

Alternatives to YouTube

August 10th, 2011

In our school, and many others, I’m guessing, YouTube is blocked. This has some pros and cons. Pro? There is some nasty stuff on YouTube. Con? Teachers can’t show clips that supplement their instruction.

That being said, here are some sites that you might be able to find clips to use:

Khan Academy – Even though YouTube’s blocked, Khan Academy videos are still viewable. These are amazing videos that demonstrate in simple language pretty complex math and science concepts.

5min.com – http://www.5min.com/Category/Knowledge has 5-minute videos (thus the name) that explain concepts in a quick but thorough manner. I easily found a video about the Homestead Act and then discovered a video from the Khan Academy about why (not just how) borrowing works in subtraction problems.

MovieWeb – Do you want to show 30 seconds worth of a film instead of the whole thing? Try http://www.movieweb.com/.

and then you have the classics TeacherTube and SchoolTube if you want to share videos (and find ones shared by other educators…I prefer SchoolTube over TeacherTube because it loads faster).

Hopefully that helps!

Reposting: iMovie Titles

February 6th, 2011
  1. Click on the iMovie HD icon in the dock. (If it’s not there, go to the ‘Finder’ and select ‘Applications’.)
  2. Create a New Project
  3. Name it with the assignment name, your class period, and your last name. (Example: ‘portfolio-4th-guy’). Save it to the hard drive by selecting Macintosh HD->Users->Shared and then click Save
  4. Click on Editing -> Titles to add your text.
    Photobucket
  5. Make sure that your text is big enough to read. You will probably need to split up your sentences into smaller phrases.
  6. Type single words as titles for emphasis.
  7. You can use the slide to adjust how many seconds the animation takes and how long it pauses.
    Photobucket
  8. For pictures, drag your image from the desktop/documents onto the timeline/clip view.
    Photobucket
  9. To change the animation, click on the photo to select it. Click on Media->Photos and then Show Photo Settings
  10. With the Ken Burns Effect on, the photo will slide in/zoom out in many different ways. Drag the top slide bar to zoom in and out. Drag the bottom one to make the animation speed up or slow down.
    Photobucket
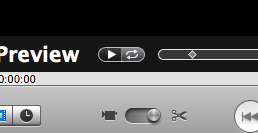
  11. Your Preview bar has its own animation timeline. Click on the animation timeline to select which place to zoom in.
    Photobucket
  12. The hand lets you control the position of the photo. Click and drag to move the camera’s focus.
  13. To add sound, make sure that you are in the project’s timeline mode first. Click on the clock to switch from clip mode to timeline mode.
    Photobucket
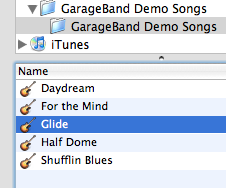
  14. Click on Audio to view your iTunes library, GarageBand songs, and Skywalker sound effects.
    Photobucket
  15. Click on a song and drag it to the second line in the timeline.
    Photobucket
  16. Click on the triangle and drag it to go to different parts of the timeline/project.
  17. To shorten a clip, click on it to highlight it, move the triangle to where you want to cut it, select from the top menu Edit->Split Clip to make the cut.
    Photobucket
  18. Click off of the clips to deselect both, then click back on the clip that you don’t want. Press the delete key to get rid of it.
  19. Click on Editing->Transitions or Editing-> Video FX to make your presentation more professional.

Oceanography Videos

April 14th, 2009

As Crowell’s class is working on oceanography iMovies, these sites might be a good place for videos to use in your projects:

Michael Johnson Marine Natural History Photography

Cosmeo from Discovery Channel

For teachers to sign up for videos:
Teachers’ Domain

iMovie Titles

November 1st, 2007

This tutorial is designed for use with the poetry portfolio assignment, but can be applied to other work.

  1. Click on the iMovie HD icon in the dock.
  2. Create a New Project
  3. Name it with the assignment name, your class period, and your last name. (Example: ‘portfolio-4th-guy’). Save it to the hard drive by selecting Macintosh HD->Users->Shared and then click Save
  4. Click on Editing -> Titles to add your text.
    Photobucket
  5. Make sure that your text is big enough to read. You will probably need to split up your sentences into smaller phrases.
  6. Type single words as titles for emphasis.
  7. You can use the slide to adjust how many seconds the animation takes and how long it pauses.
    Photobucket
  8. For pictures, drag your image from the desktop/documents onto the timeline/clip view.
    Photobucket
  9. To change the animation, click on the photo to select it. Click on Media->Photos and then Show Photo Settings
  10. With the Ken Burns Effect on, the photo will slide in/zoom out in many different ways. Drag the top slide bar to zoom in and out. Drag the bottom one to make the animation speed up or slow down.
    Photobucket
  11. Your Preview bar has its own animation timeline. Click on the animation timeline to select which place to zoom in.
    Photobucket
  12. The hand lets you control the position of the photo. Click and drag to move the camera’s focus.
  13. To add sound, make sure that you are in the project’s timeline mode first. Click on the clock to switch from clip mode to timeline mode.
    Photobucket
  14. Click on Audio to view your iTunes library, GarageBand songs, and Skywalker sound effects.
    Photobucket
  15. Click on a song and drag it to the second line in the timeline.
    Photobucket
  16. Click on the triangle and drag it to go to different parts of the timeline/project.
  17. To shorten a clip, click on it to highlight it, move the triangle to where you want to cut it, select from the top menu Edit->Split Clip to make the cut.
    Photobucket
  18. Click off of the clips to deselect both, then click back on the clip that you don’t want. Press the delete key to get rid of it.
  19. Click on Editing->Transitions or Editing-> Video FX to make your presentation more professional.